Photo retouching: some thoughts and what to expect
Image retouching can be quite a polarising topic. Some clients are very wary of it, and others are worried that I won’t do any retouching at all. For that reason I thought I would explain my thoughts on image retouching in the context of corporate/business headshot photography, and show you the sorts of things that I do and what you can expect when I retouch your photograph.
Why retouching is needed
All of the photographs that I make require some sort of retouching after the photo session is over, even if it is as little as removing some unwanted dust spots from a suit jacket for example. But the fact is that the image is never completely right straight out of the camera: colours usually need to be corrected; contrast and sometimes brightness needs to be adjusted; small dust spots from the camera’s electronic sensor need to be removed … In other words, there is always some basic retouching work that needs to be done as a routine and normal part of the process of making photographs.
But more than that, I think image retouching plays a very important role in bridging the gap between the way we see things in real life and the way the camera sees things. Let me explain what I mean.
Firstly, when we look at something we have the ability to isolate or pay attention to particular things in our field of vision. For example, when we are talking with somebody we have the ability to pay attention to that person and to mentally disregard everything else in our field of vision, such as background elements. However, when we view a photograph we look at the whole picture all at once (at least at first) and if there are distractions in the picture then they will adversely impact on the impression that the photograph would otherwise make. So retouching can help people to focus on the part of the image that is important — the person’s face for example — by removing visual distractions or by subtly altering tones and shades so that the viewer is more likely to pay attention to the parts of the image that matter and not be distracted by unnecessary elements.
Secondly, we never see everything all at once in real life. Our brains assemble a composite of impressions that are put together from many, many glances that we are constantly making. Scientists call these glances ‘saccades’. We then do all sorts of complicated mental processing of that visual information that makes it seem as though our vision is continuous and steady.
But that’s not how a camera sees. A photograph shows how something or someone looks for just a split second in time — it’s not a composite or an illusion created by our brains from all of the visual input from our eyes over a certain amount of time. So when, for example, we look at a photograph of somebody what we see is how things appeared in that single slice of time (maybe just 1/200th of a second) and not how that person appears to us when we look at them and engage with them normally. If, for example, we see in the picture that there is tension in somebody’s jaw, or we see a slightly crooked smile, or we see a slightly odd look in their eyes, then that’s what it looked like right at the moment when the camera’s shutter was clicked but that’s not really a true representation of how that person appears in real life.
So the job of good retouching is to get the image closer to the way it actually looks in real life. So, for example, the constantly fluctuating chin and jaw muscles that give the momentary appearance of tension need to be dealt with in the retouching process in order to make them appear as they would normally. Headshot retouching in particular is full of such instances of obvious incongruities between how somebody appears in normal life and how they appear in that fraction of a second that the camera took to make the image.
Below is an example of what I mean. The first image is un-retouched, straight from the camera. You can see the tension in the chin in particular. The second image is the retouched version, making the chin appear as it normally does to anybody looking at this person in real life.

Straight from the camera with no retouching.

After retouching.
Static lighting emphasises localised areas of tonal variations that would not normally be noticed in any real-life engagement with the person being photographed. I see these effects as having been introduced by the process of photographing a person and so I think that part of the job of retouching is to negate or undo those artificially introduced artefacts. In real life, the person would not be completely rigid nor would the lighting be completely directionally static. In real life shadows and tones are constantly moving and we don’t see or pay attention to each little change in light and shade on someone’s face. But that’s not the case in photographs.
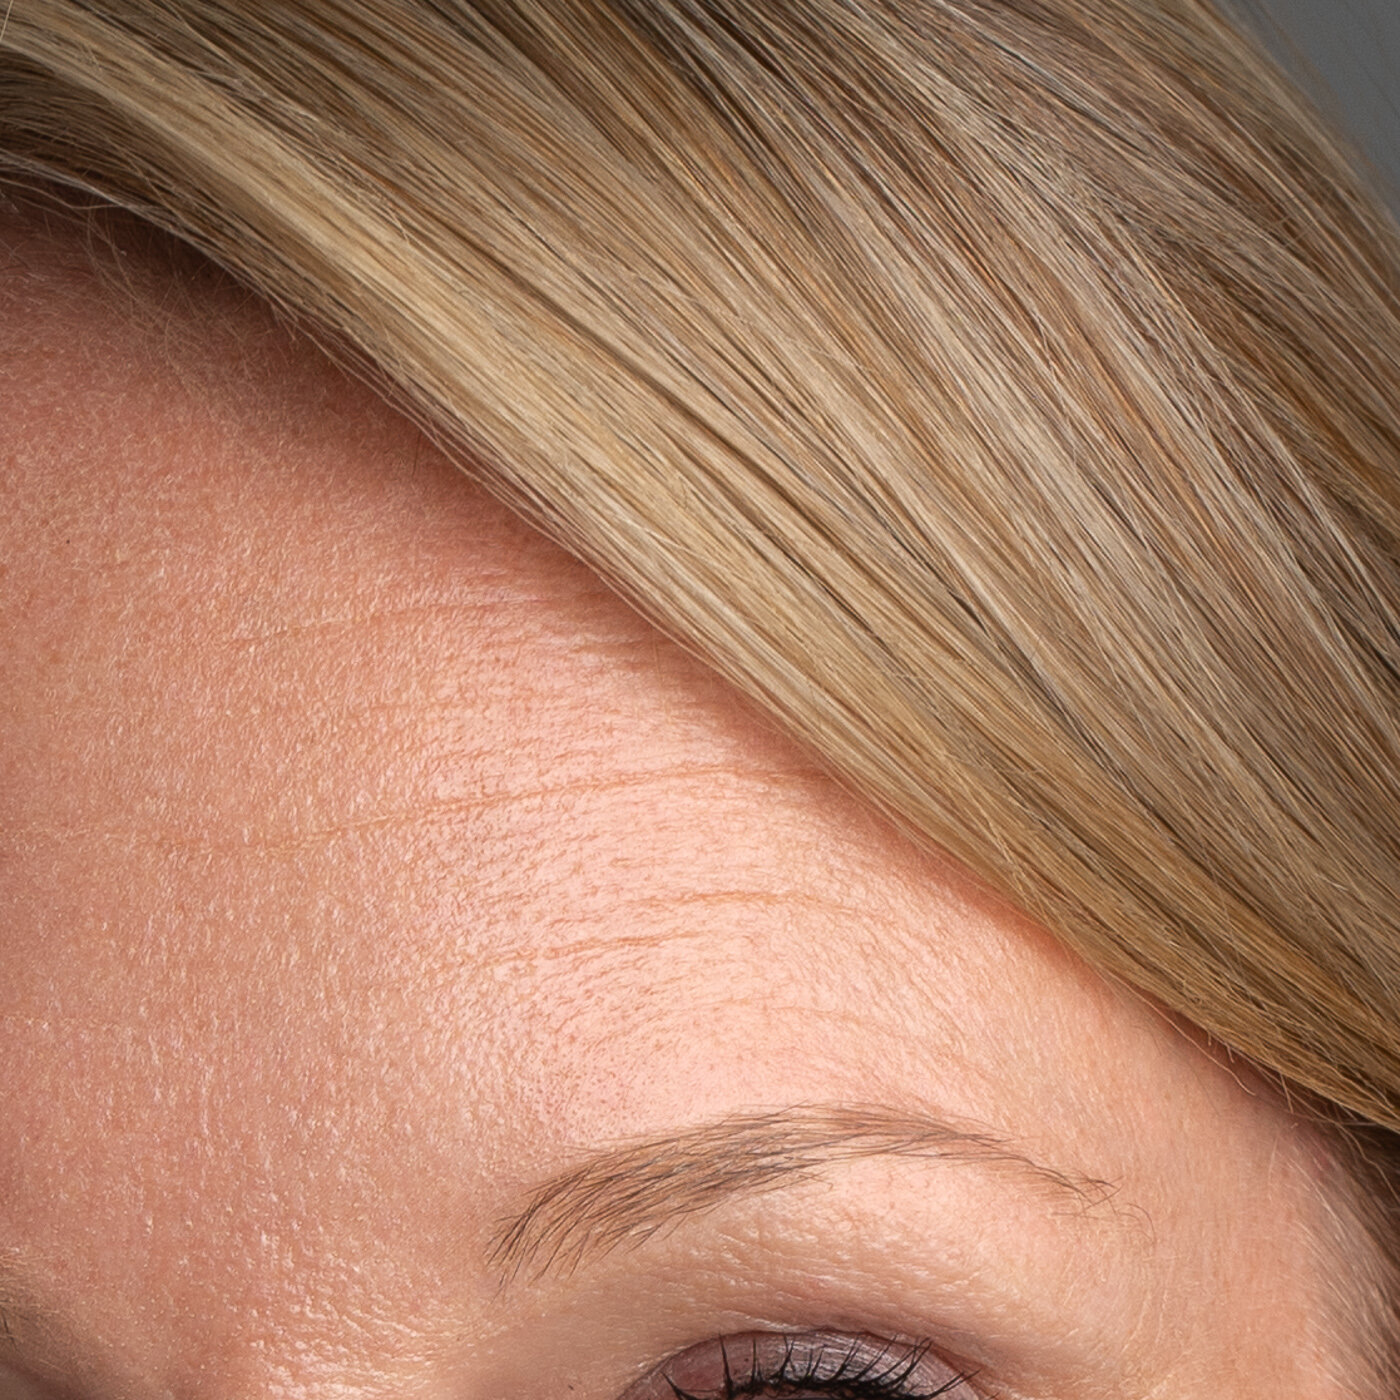
Here is another example. In the un-retouched image we can see some uncomplimentary shading on the edge of the person’s forehead. This makes it look like the person has a kind of edge or corner on his forehead, which is actually just the momentary result of his head position in relation to the light and we wouldn’t normally see it like this in real life. The retouched image fixes that effect so that his forehead looks as it normally would.

Before retouching. Notice the obvious forehead shadow.

After retouching.
My approach to retouching
A lot of the above explanation about why I think retouching is required also goes a long way to explaining my own approach to headshot retouching. So while I try to use retouching to normalise the effects of capturing a small moment in time in relation to the experiential amalgam that our brains create for us, I always try to keep it realistic and I don’t change the way the people I photograph would normally look in real life. I certainly do what I can to make them look their best, but it’s always grounded and limited by how they really look. So if you were to ask me to composite your face onto a different body for example, then that would definitely not be something that I would do. Having said that, I do retouch and alter specific areas if the client requests it, and if I think it’s reasonable and doesn’t mis-represent how they look. I’ll give some examples of that below.
Skilled vs unskilled retouching
It’s very, very easy to make a complete mess of the retouching process and to end up with poor or downright awful results. I recognised many years ago that there is no place for bad retouching and so I set about learning from some of the very best retouchers. These days I’m very skilled at it — even if I do say so myself — but unfortunately many people — and even many otherwise good photographers — think that it’s just a matter of clicking some things in Photoshop, or of applying some sort of plug-in or preset that you can buy and the job is magically done in minutes or seconds. Wrong!
Let me show you what happens when people retouch badly, or rely on some sort of generic software to do the job.
Below is an image straight from the camera. In this case I wanted to work on the skin and highlights on the subject’s cheek.
The second image shows the result of a professional and skilled retouch. You can see that the skin texture is unbroken, the shading is smooth and realistic, and the skin looks a whole lot better.

Straight from the camera.
Skillfully retouched. The skin texture is clean and unbroken.
But in the following two images you can see what happens if the the same area is retouched badly. In this case I applied a technique that is very commonly used because it is quick. You can see that the skin texture is broken and discontinuous and in some parts it looks quite smudgy. It might look alright if the picture is small or seen from a distance, but if it’s used in a larger size, or in print instead of on a screen, or viewed closely, then it will look noticeably bad.
And in the image next to it you can see happened when I used one of the popular Photoshop plug-ins. Again, the skin texture has just been smoothed out far too much and the original uneven tones are still present. The skin here looks plastic-like and just terrible.

The retouching work has broken the skin texture.

The use of an automated retouching tool produces awful results.
Good retouching is painstaking, detailed, time consuming, and completely dependant on the image in question. Typically a headshot retouch will take me anywhere from 20 minutes to two hours, depending on the work that needs to be done. That’s a lot of time in addition to the photo shoot itself but I believe it’s absolutely worthwhile and in integral part of the overall process of making great headshot photographs.
Routine retouches
Dust, hair, and spot removal
These retouches happen on every image and are mostly uncontroversial in any way. Here are some examples:
Hair retouching is tricky but frequently necessary. In general I remove fly-aways when they are distracting or too obvious, and sometimes I alter the hair shape or position when I feel it’s necessary.
Skin blemishes
Temporary skin blemishes, like pimples or shaving cuts, are always removed. However if skin marks are not temporary then I might remove them if they are small and insignificant. If permanent skin marks are more obvious, such as scars, then I’ll frequently tone them down so they are less obvious but still present. Sometimes skin marks are more obvious depending on how they reflect light, so toning them down in this way is a good way of dealing with them.
Tonal work
This is where a lot of the retouching magic happens. A lot of this work is aimed at achieving what I described above — bridging that gap between what the camera sees and how you actually “see” somebody in real life. For example, many people have a vein that runs vertically down the middle of their forehead although it’s usually not obvious in everyday life. Unfortunately they can appear unrealistically obvious in photographs depending on how they are lit and so tone and shading work is used to mitigate this effect. Here is an example.

Studio lighting makes the forehead vein too noticeable.

The retouched forehead.
Another common illustration of the importance of good tonal retouching is the dreaded double chin. Of course there are several techniques that can be used at the time of the photo session to minimise the double chin effect, but did you know that if you’re wearing a white or light-toned shirt that some light will be reflected upwards which subtly draws attention to the area under your chin, just where you don’t want attention to be drawn. Retouching helps by removing or reducing that unwanted effect.

Double-chin illusion in the original photograph caused by reflected light.

The double-chin effect has been removed.
Skin lines and creases on the neck is another area to which I commonly apply tonal retouching. Frequently I ask clients to stand with their shoulders angled but to turn their head to look directly at the camera. This is a recipe for creating noticeable creases in the neck, and so I think it’s incumbent upon me to retouch that area so the creases are less distracting because momentary skin creases as a person turns his or her head is not something that we would normally pay any attention to in real life.
Large retouches
Finally, let me show you the following retouch that I recently did. In this case the client specifically asked me to do this work, and it was all done by altering the light, shade, and the colour saturation in the area in question. Nothing else was changed — there was no compositing or cloning or any use at all of any of the other more aggressive retouching tools. I wanted to show this image because this is probably the limit of what I would do in a headshot retouch.

Original photo straight from the camera.

After retouching the neck.
I hope that has given you some insight into the role of retouching in my work, how I approach it, the reasons why I do it, and the skill that I have in this area.
As always, feel free to give me a call or email if you would to discuss any of this with me.